If your interiors look “flat,” plastic, or strangely empty—even with great materials and furniture—there’s a high chance the problem isn’t your model. It’s the light.
In professional visualization, lighting in interior 3D rendering is the difference between a believable room and a scene that feels like a showroom mock-up. Lighting creates depth, reveals textures, shapes the mood, and tells the viewer where to look. It also makes your space feel realistic because it behaves the way light behaves in real life: it bounces, it fades, it changes color, and it creates shadows that give form to everything.
This guide breaks down interior lighting fundamentals in a practical way, focusing on three common categories: day scenes, night scenes, and mixed scenes (daylight plus artificial light). You’ll learn how to choose a light source, how global illumination affects the rendered image, and how to avoid the classic mistakes that make renders look fake.
Why lighting is the first thing your viewer notices
A viewer may not know exactly what’s wrong in a render, but they feel it immediately. Lighting drives that reaction.
Good lighting does a few critical things:
It defines the form of the room and the scale of the space
It makes materials believable by revealing texture and roughness
It creates contrast so the eye knows where to focus
It controls mood: cozy, premium, bright, dramatic, calm
It makes interior design decisions look intentional, not accidental
Even when your modeling and materials are perfect, poor lighting makes the final rendered image feel like CGI. That’s why lighting is treated as a core skill in every professional 3D rendering studio.
Understand your light sources before you start rendering
Every interior scene has two broad types of light sources:
Natural lighting
Sun and sky coming through windows, doors, skylights, or openings
It changes depending on time of day, orientation, and weather
Artificial light
Ceiling fixtures, downlights, pendants, lamps, wall sconces, strip lighting
It is controllable and creates specific zones of brightness
When you start a scene, decide what the “hero” light source is:
Is the space defined by daylight and soft shadows?
Is it a warm night interior with pools of light from lamps?
Is it a mixed scene where daylight and lighting fixtures work together?
If you skip this decision and just add lights everywhere, the render becomes chaotic: overly bright, unnatural, and full of conflicting shadows.
Global illumination: the realism engine behind good interiors
One term you’ll hear often is global illumination. It sounds technical, but the idea is simple:
Light doesn’t just travel in a straight line. It bounces.
In real interiors, light hits a wall, reflects, spreads, softens, and fills the room. That bounce light is what creates realism—especially in corners, under cabinets, and along ceilings.
When global illumination is set up properly in your 3D rendering workflow:
Shadows are softer and more natural
Brightness levels feel realistic rather than harsh
The room looks “filled with light” instead of lit by spotlights
Materials react correctly to light and reflections
This is the core reason why some scenes feel photographic and others feel artificial. GI gives your interior lighting a physical logic.
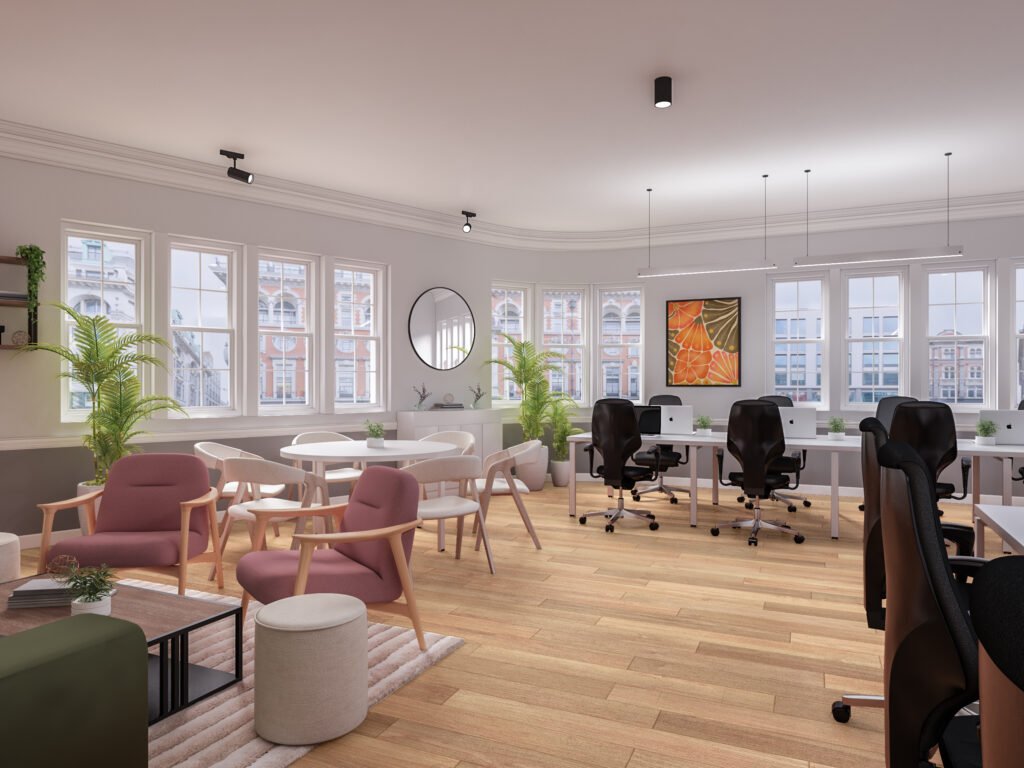
Day scenes: working with natural lighting

Day interiors are the best place to learn because natural light is “honest.” It instantly shows mistakes in exposure, color, and shadow softness.
Step 1: Choose the time of day
Time of day changes everything:
Morning gives long, angled shadows and a softer mood
Midday gives hard shadows and can flatten interiors if overused
Afternoon is warm, directional, and often the most flattering
Overcast gives soft shadows and even brightness, great for clarity
A beginner mistake is using harsh midday sun for every room. It can make a space feel clinical. Overcast daylight is often the easiest way to create a bright, clean interior design visual.
Step 2: Control exposure, not the sunlight
If your room looks too dark, don’t immediately increase light intensity. Often, you should adjust camera exposure first. Real interiors rely on camera settings as much as they rely on light power.
A balanced day scene usually has:
Bright window areas (but not pure white blowouts)
Gentle shadow gradients across floors and walls
A readable interior without making the space look “lit from inside”
Step 3: Use realistic window behavior
Windows are not just holes in the wall. Glass affects light:
It reduces brightness slightly
It adds reflections
It changes the tone depending on coatings and angle
In many interiors, correct glass settings are the difference between a believable render and a fake one.
Step 4: Watch shadow direction and softness
Day scenes should have clear but natural shadows. Shadow softness depends on sky conditions:
Sunny = sharper shadows
Overcast = softer shadows
If you see razor-sharp shadows in a supposed “soft daylight” interior, your lighting setup is inconsistent.
Night scenes: creating depth with artificial light
Night scenes are harder because everything depends on the lighting fixtures. You’re no longer borrowing realism from the sun.
Step 1: Build a lighting hierarchy
Real rooms don’t have every light at maximum brightness. They use layers:
Ambient: general room brightness (ceiling lights, indirect lights)
Task: functional light (kitchen counters, desks, reading corners)
Accent: mood and highlights (wall washers, strip lighting, lamps)
When you build night scenes, create those layers deliberately. This approach instantly improves realistic lighting because it mirrors real interior lighting design.
Step 2: Use believable color temperatures
Night interiors feel realistic when different lights have different tones:
Warm lamps and pendants
Slightly cooler ceiling fixtures
Neutral task lighting in kitchens and workspaces
Even if you don’t measure every Kelvin value, you should avoid making every light the same color. Uniform lighting makes CGI look synthetic.
Step 3: Respect light falloff
Light falloff is how light fades over distance. In real life, brightness drops quickly as you move away from a lamp.
If your night render shows a room evenly bright from a single lamp, the falloff is wrong. Correct falloff creates:
Cozy pools of light
Gradients on walls
Natural dark zones that add contrast and depth
Darkness is not the enemy in night renders. Flat brightness is.
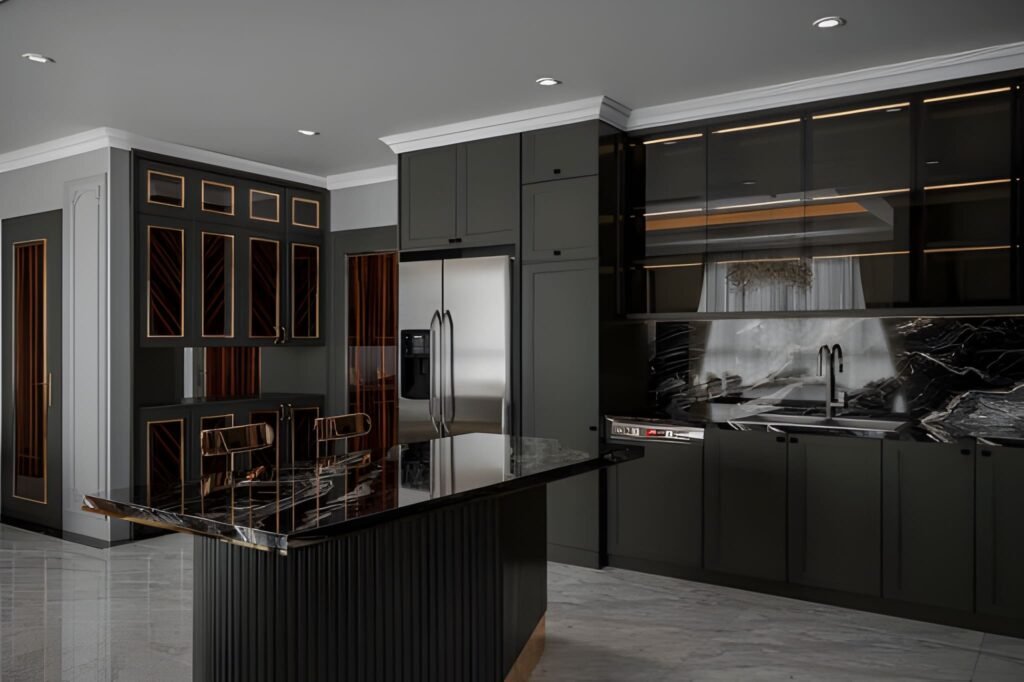
Step 4: Control reflections and hotspots

Artificial light creates strong highlights on glossy surfaces:
Polished floors
Kitchen cabinets
Glass and metal fixtures
If highlights are too sharp or too bright, the rendered image looks harsh. Adjust material roughness and light intensity together rather than trying to fix everything in post.
Mixed scenes: daylight plus artificial lights (the most common client request)
Mixed scenes are extremely popular because they show a room at its most “sellable” moment: evening light coming through windows and warm interior fixtures creating atmosphere.
But mixed lighting is also where many renders fall apart because it is easy to overdo both sources.
Step 1: Decide which light is dominant
A mixed scene still needs a hierarchy:
Daylight dominant with subtle artificial accents
Artificial dominant with soft remaining daylight
Balanced mix (harder to pull off, but powerful)
Without a dominant light, the room looks confused.
Step 2: Balance intensities carefully
A common issue: daylight is bright and artificial lights are bright, so everything becomes overexposed.
Instead, aim for:
Daylight that shapes the room and gives direction
Artificial lights that warm the space and create focal points
This balance is what makes mixed scenes feel premium and realistic.
Step 3: Avoid conflicting shadows
If you place too many lights, you get multiple shadow directions, which instantly reveals CGI. Simplify. Use fewer lights but place them more intentionally.
Step 4: Use practical fixtures that “explain” the light
In a believable interior, the viewer can understand where light comes from. If a wall is bright but there is no lamp, sconce, or window explaining it, the scene feels wrong.
Always connect illumination to visible lighting fixtures or natural openings.
Light intensity: stop guessing and start comparing
One of the biggest jumps in skill is learning to judge light intensity based on reference images.
Here’s a simple method:
Choose a real interior photo similar to your target mood
Compare window brightness, wall brightness, and floor brightness
Adjust your scene until the ratios feel similar
You don’t need to be mathematically perfect. You need believable relationships. A room can be bright or dark, but it must look physically possible.
Shadows: the easiest way to add realism
Shadows are what give your objects weight.
In interior 3D rendering, realistic shadows should:
Sit naturally under furniture
Show soft gradation near contact points
Avoid floating objects (no contact shadow = fake)
Avoid pitch-black corners unless the scene is intentionally dramatic
If your scene feels “off,” inspect the shadows first. They reveal whether global illumination and your light sources are behaving realistically.
Lighting fixtures and practical interior design logic
When you place lighting fixtures, think like an interior designer:
Where would a person actually need light?
What is the function of each fixture?
What mood does each lamp or pendant create?
This mindset improves your visualization instantly because the lighting starts to tell a real story.
For example:
Kitchen: task lighting near counters, warm accents in dining
Living room: lamps near seating, softer overhead lighting, accent behind TV wall
Bedroom: bedside lamps, gentle ceiling light, optional LED accents
Even if you are purely doing visualization, the interior design logic makes your lighting believable.
The “test render” workflow professionals rely on

If you try to finish lighting in one final render, you will waste hours.
Professionals use small, controlled tests:
Quick low-resolution renders
Region rendering for problem zones (corners, reflective surfaces)
Lighting-only passes to check intensity and balance
A fast test render approach lets you iterate quickly and keeps your final render stage efficient.
Common lighting mistakes that make renders look like CGI
1) Everything is evenly bright
Real rooms are not. They have contrast, falloff, and darker zones.
2) Too many light sources
More lights often means more confusion. Use fewer, stronger lights with clear purpose.
3) Wrong color relationships
If daylight and artificial light look identical, the scene feels fake.
4) Over-sharpened shadows
Most interiors have soft shadows due to bounce light and multiple sources.
5) No visible explanation for illumination
The viewer must believe the light is coming from somewhere.
Avoid these five and your interiors will immediately look more professional.
A simple checklist for day, night, and mixed scenes
Use this checklist before your final render:
Is the dominant light source clear?
Do window areas look bright but not blown out?
Is the interior readable without looking artificially lit?
Do lighting fixtures match the brightness they appear to emit?
Are shadows consistent and believable?
Does the room feel like a real space someone could walk into?
If the answer is yes, you’re ready for a final render.
Final thoughts: lighting is the language of realism
Materials and modeling create the objects. Lighting creates the experience.
When you understand lighting in interior 3D rendering, you gain control over how your space feels—bright, calm, cozy, premium, dramatic, minimal, or warm. Day scenes teach you direction and softness through natural lighting. Night scenes teach you control through artificial light. Mixed scenes teach you hierarchy and balance.
At Archirender3D, we treat lighting as the foundation of every interior visualization because it is the fastest path to believable, client-ready renders. If you want interiors that feel real—not just technically correct—build your workflow around light first, and everything else will fall into place.
Must read can 3D architectural rendering reduce construction errors?