Lighting Fundamentals in Interior 3D Rendering: Day, Night, and Mixed Scenes Explained
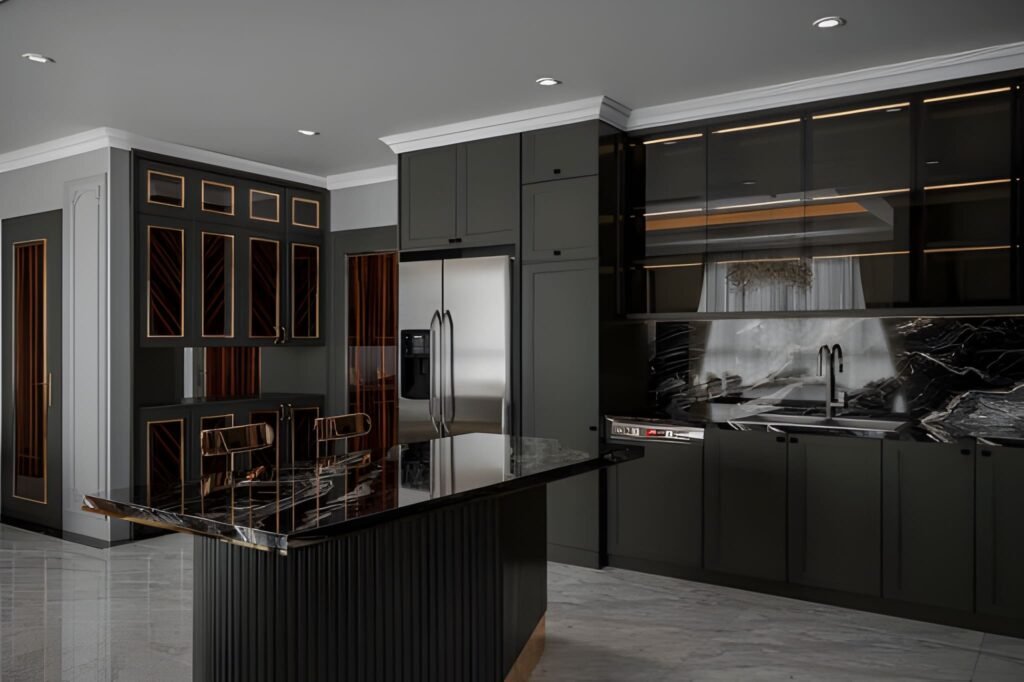
If your interiors look “flat,” plastic, or strangely empty—even with great materials and furniture—there’s a high chance the problem isn’t your model. It’s the light. In professional visualization, lighting in interior 3D rendering is the difference between a believable room and a scene that feels like a showroom mock-up. Lighting creates depth, reveals textures, shapes the mood, and tells the viewer where to look. It also makes your space feel realistic because it behaves the way light behaves in real life: it bounces, it fades, it changes color, and it creates shadows that give form to everything. This guide breaks down interior lighting fundamentals in a practical way, focusing on three common categories: day scenes, night scenes, and mixed scenes (daylight plus artificial light). You’ll learn how to choose a light source, how global illumination affects the rendered image, and how to avoid the classic mistakes that make renders look fake. Why lighting is the first thing your viewer notices A viewer may not know exactly what’s wrong in a render, but they feel it immediately. Lighting drives that reaction. Good lighting does a few critical things: It defines the form of the room and the scale of the space It makes materials believable by revealing texture and roughness It creates contrast so the eye knows where to focus It controls mood: cozy, premium, bright, dramatic, calm It makes interior design decisions look intentional, not accidental Even when your modeling and materials are perfect, poor lighting makes the final rendered image feel like CGI. That’s why lighting is treated as a core skill in every professional 3D rendering studio. Understand your light sources before you start rendering Every interior scene has two broad types of light sources: Natural lighting Sun and sky coming through windows, doors, skylights, or openings It changes depending on time of day, orientation, and weather Artificial light Ceiling fixtures, downlights, pendants, lamps, wall sconces, strip lighting It is controllable and creates specific zones of brightness When you start a scene, decide what the “hero” light source is: Is the space defined by daylight and soft shadows? Is it a warm night interior with pools of light from lamps? Is it a mixed scene where daylight and lighting fixtures work together? If you skip this decision and just add lights everywhere, the render becomes chaotic: overly bright, unnatural, and full of conflicting shadows. Global illumination: the realism engine behind good interiors One term you’ll hear often is global illumination. It sounds technical, but the idea is simple: Light doesn’t just travel in a straight line. It bounces. In real interiors, light hits a wall, reflects, spreads, softens, and fills the room. That bounce light is what creates realism—especially in corners, under cabinets, and along ceilings. When global illumination is set up properly in your 3D rendering workflow: Shadows are softer and more natural Brightness levels feel realistic rather than harsh The room looks “filled with light” instead of lit by spotlights Materials react correctly to light and reflections This is the core reason why some scenes feel photographic and others feel artificial. GI gives your interior lighting a physical logic. Day scenes: working with natural lighting Day interiors are the best place to learn because natural light is “honest.” It instantly shows mistakes in exposure, color, and shadow softness. Step 1: Choose the time of day Time of day changes everything: Morning gives long, angled shadows and a softer mood Midday gives hard shadows and can flatten interiors if overused Afternoon is warm, directional, and often the most flattering Overcast gives soft shadows and even brightness, great for clarity A beginner mistake is using harsh midday sun for every room. It can make a space feel clinical. Overcast daylight is often the easiest way to create a bright, clean interior design visual. Step 2: Control exposure, not the sunlight If your room looks too dark, don’t immediately increase light intensity. Often, you should adjust camera exposure first. Real interiors rely on camera settings as much as they rely on light power. A balanced day scene usually has: Bright window areas (but not pure white blowouts) Gentle shadow gradients across floors and walls A readable interior without making the space look “lit from inside” Step 3: Use realistic window behavior Windows are not just holes in the wall. Glass affects light: It reduces brightness slightly It adds reflections It changes the tone depending on coatings and angle In many interiors, correct glass settings are the difference between a believable render and a fake one. Step 4: Watch shadow direction and softness Day scenes should have clear but natural shadows. Shadow softness depends on sky conditions: Sunny = sharper shadows Overcast = softer shadows If you see razor-sharp shadows in a supposed “soft daylight” interior, your lighting setup is inconsistent. Night scenes: creating depth with artificial light Night scenes are harder because everything depends on the lighting fixtures. You’re no longer borrowing realism from the sun. Step 1: Build a lighting hierarchy Real rooms don’t have every light at maximum brightness. They use layers: Ambient: general room brightness (ceiling lights, indirect lights) Task: functional light (kitchen counters, desks, reading corners) Accent: mood and highlights (wall washers, strip lighting, lamps) When you build night scenes, create those layers deliberately. This approach instantly improves realistic lighting because it mirrors real interior lighting design. Step 2: Use believable color temperatures Night interiors feel realistic when different lights have different tones: Warm lamps and pendants Slightly cooler ceiling fixtures Neutral task lighting in kitchens and workspaces Even if you don’t measure every Kelvin value, you should avoid making every light the same color. Uniform lighting makes CGI look synthetic. Step 3: Respect light falloff Light falloff is how light fades over distance. In real life, brightness drops quickly as you move away from a lamp. If your night render shows a room evenly bright from a single lamp, the falloff is wrong. Correct falloff creates: Cozy pools of light Gradients on walls
How 3D Exterior Rendering Transforms Architectural Design
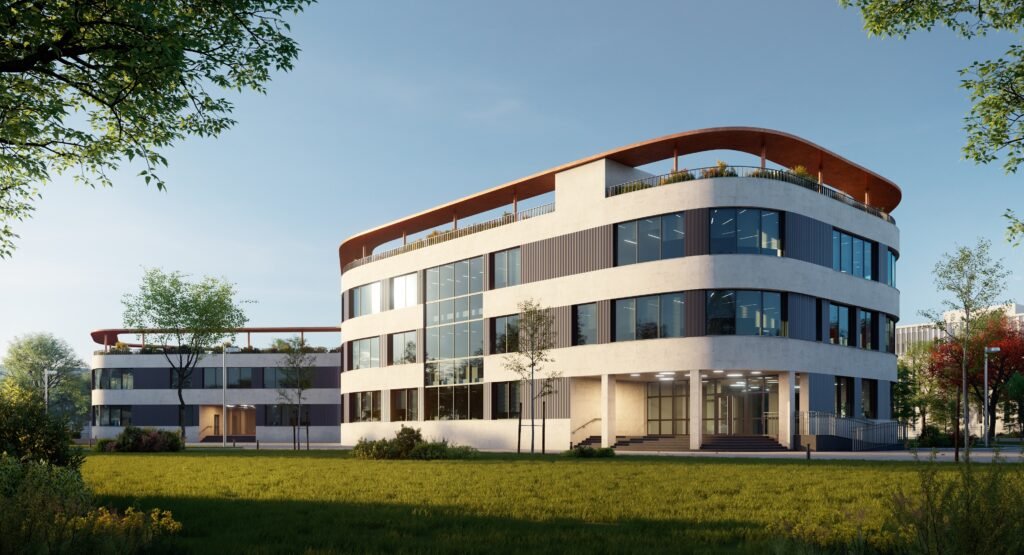
In today’s fast-evolving architectural landscape, the way we present our projects can determine success. The advent of 3D exterior rendering has transformed architectural design practices, enabling designers, builders, and real estate professionals to communicate their visions in the most dynamic, impactful way.
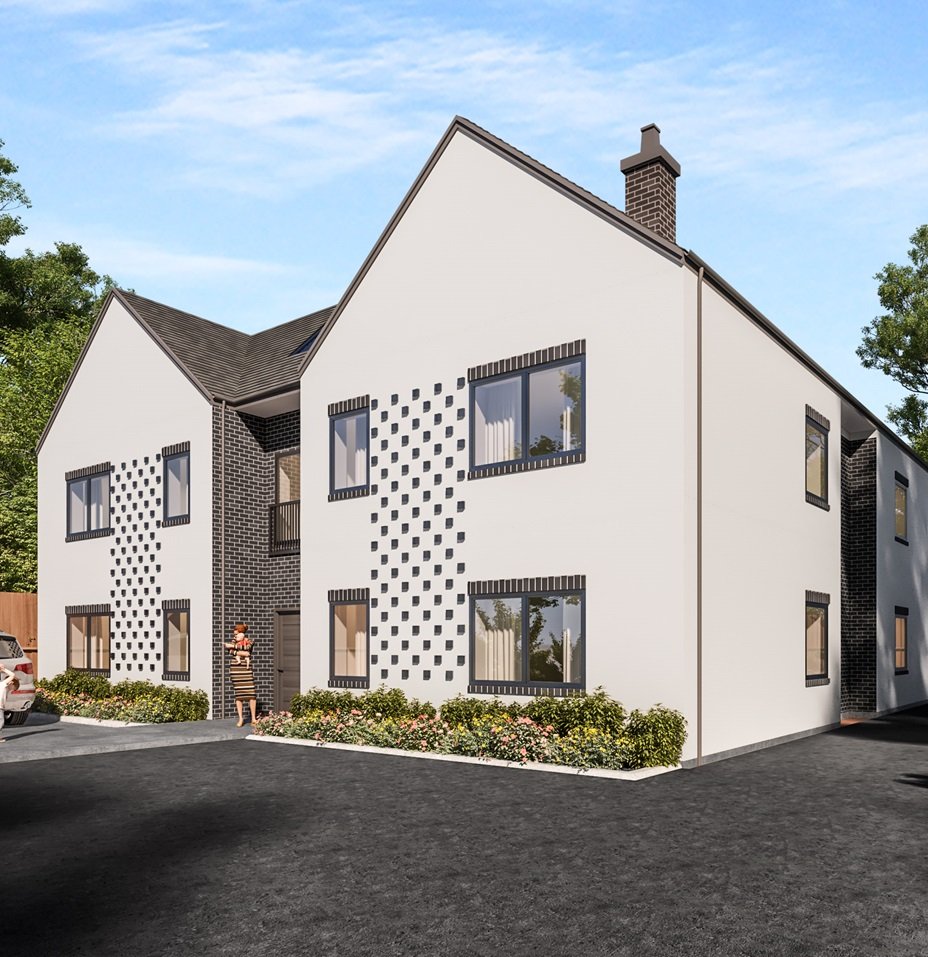
Debunking Myths About 3D Architectural Rendering: Myths & Facts
In today’s competitive real estate and architecture landscape, 3D architectural rendering has emerged as an indispensable tool for attracting investors, boosting sales, and enhancing marketing strategies.
What is 3D Architectural Rendering? Your Ultimate Guide
Imagine walking through your dream home before it’s even built. You glide through the grand entrance, admire the intricate ceiling details, and step onto the balcony to take in a breathtaking view—all without laying a single brick.