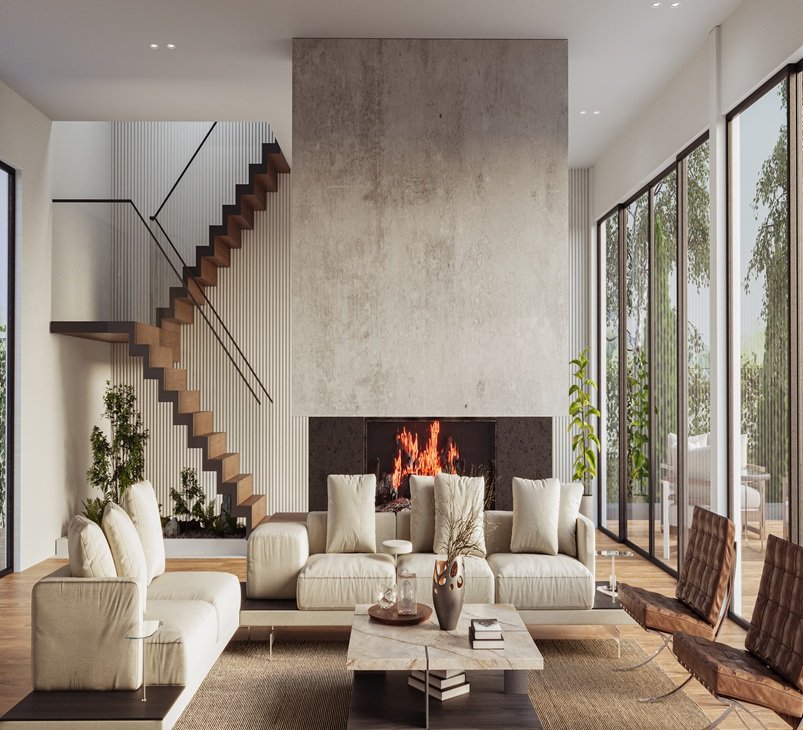
Lighting Fundamentals in Interior 3D Rendering: Day, Night, and Mixed Scenes Explained
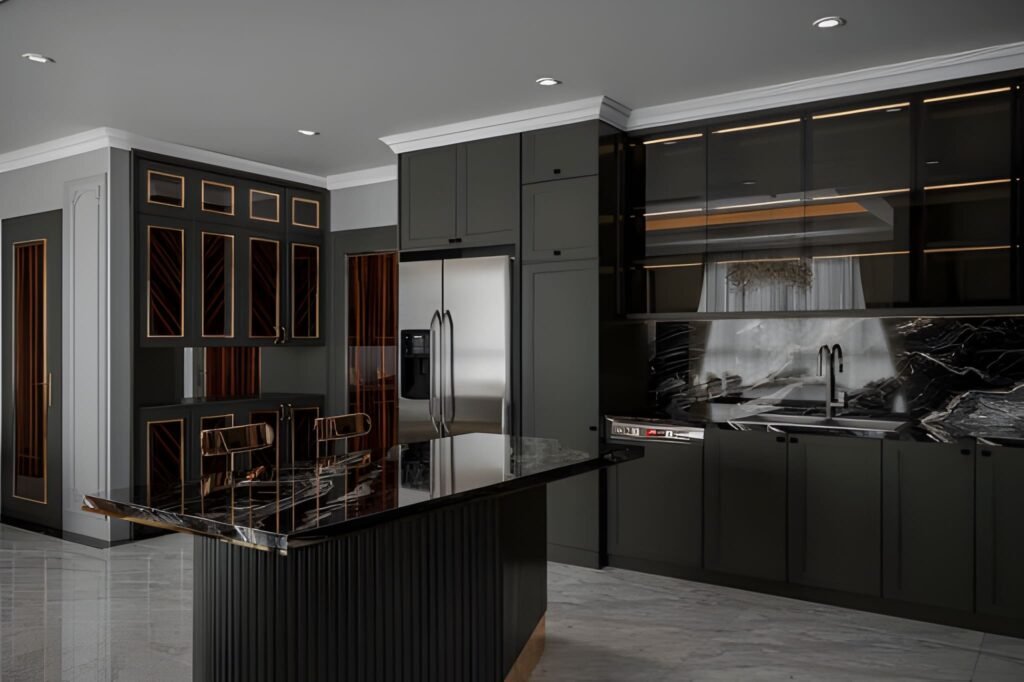
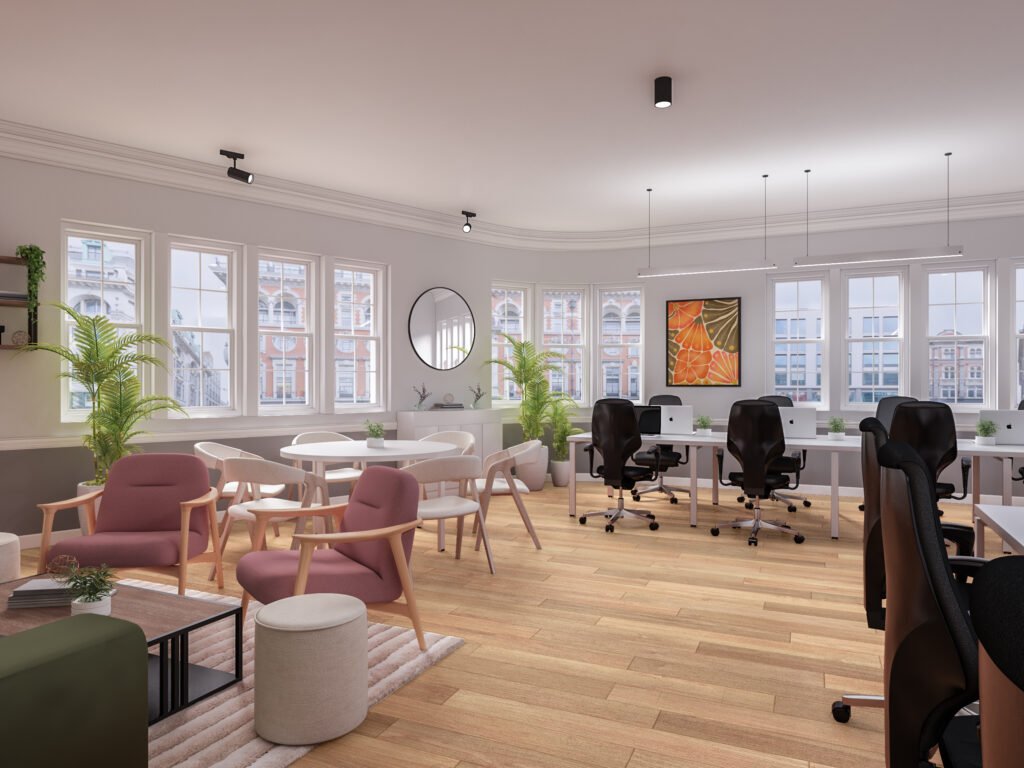
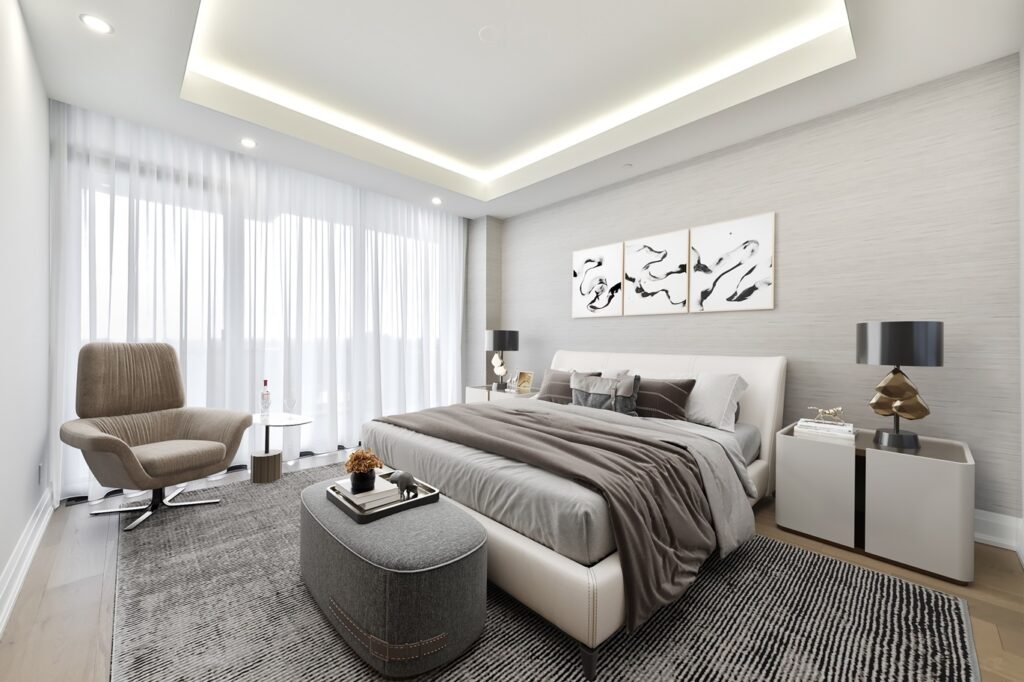
If your interiors look “flat,” plastic, or strangely empty—even with great materials and furniture—there’s a high chance the problem isn’t your model. It’s the light. In professional visualization, lighting in interior 3D rendering is the difference between a believable room and a scene that feels like a showroom mock-up. Lighting creates depth, reveals textures, shapes the mood, and tells the viewer where to look. It also makes your space feel realistic because it behaves the way light behaves in real life: it bounces, it fades, it changes color, and it creates shadows that give form to everything. This guide breaks down interior lighting fundamentals in a practical way, focusing on three common categories: day scenes, night scenes, and mixed scenes (daylight plus artificial light). You’ll learn how to choose a light source, how global illumination affects the rendered image, and how to avoid the classic mistakes that make renders look fake. Why lighting is the first thing your viewer notices A viewer may not know exactly what’s wrong in a render, but they feel it immediately. Lighting drives that reaction. Good lighting does a few critical things: It defines the form of the room and the scale of the space It makes materials believable by revealing texture and roughness It creates contrast so the eye knows where to focus It controls mood: cozy, premium, bright, dramatic, calm It makes interior design decisions look intentional, not accidental Even when your modeling and materials are perfect, poor lighting makes the final rendered image feel like CGI. That’s why lighting is treated as a core skill in every professional 3D rendering studio. Understand your light sources before you start rendering Every interior scene has two broad types of light sources: Natural lighting Sun and sky coming through windows, doors, skylights, or openings It changes depending on time of day, orientation, and weather Artificial light Ceiling fixtures, downlights, pendants, lamps, wall sconces, strip lighting It is controllable and creates specific zones of brightness When you start a scene, decide what the “hero” light source is: Is the space defined by daylight and soft shadows? Is it a warm night interior with pools of light from lamps? Is it a mixed scene where daylight and lighting fixtures work together? If you skip this decision and just add lights everywhere, the render becomes chaotic: overly bright, unnatural, and full of conflicting shadows. Global illumination: the realism engine behind good interiors One term you’ll hear often is global illumination. It sounds technical, but the idea is simple: Light doesn’t just travel in a straight line. It bounces. In real interiors, light hits a wall, reflects, spreads, softens, and fills the room. That bounce light is what creates realism—especially in corners, under cabinets, and along ceilings. When global illumination is set up properly in your 3D rendering workflow: Shadows are softer and more natural Brightness levels feel realistic rather than harsh The room looks “filled with light” instead of lit by spotlights Materials react correctly to light and reflections This is the core reason why some scenes feel photographic and others feel artificial. GI gives your interior lighting a physical logic. Day scenes: working with natural lighting Day interiors are the best place to learn because natural light is “honest.” It instantly shows mistakes in exposure, color, and shadow softness. Step 1: Choose the time of day Time of day changes everything: Morning gives long, angled shadows and a softer mood Midday gives hard shadows and can flatten interiors if overused Afternoon is warm, directional, and often the most flattering Overcast gives soft shadows and even brightness, great for clarity A beginner mistake is using harsh midday sun for every room. It can make a space feel clinical. Overcast daylight is often the easiest way to create a bright, clean interior design visual. Step 2: Control exposure, not the sunlight If your room looks too dark, don’t immediately increase light intensity. Often, you should adjust camera exposure first. Real interiors rely on camera settings as much as they rely on light power. A balanced day scene usually has: Bright window areas (but not pure white blowouts) Gentle shadow gradients across floors and walls A readable interior without making the space look “lit from inside” Step 3: Use realistic window behavior Windows are not just holes in the wall. Glass affects light: It reduces brightness slightly It adds reflections It changes the tone depending on coatings and angle In many interiors, correct glass settings are the difference between a believable render and a fake one. Step 4: Watch shadow direction and softness Day scenes should have clear but natural shadows. Shadow softness depends on sky conditions: Sunny = sharper shadows Overcast = softer shadows If you see razor-sharp shadows in a supposed “soft daylight” interior, your lighting setup is inconsistent. Night scenes: creating depth with artificial light Night scenes are harder because everything depends on the lighting fixtures. You’re no longer borrowing realism from the sun. Step 1: Build a lighting hierarchy Real rooms don’t have every light at maximum brightness. They use layers: Ambient: general room brightness (ceiling lights, indirect lights) Task: functional light (kitchen counters, desks, reading corners) Accent: mood and highlights (wall washers, strip lighting, lamps) When you build night scenes, create those layers deliberately. This approach instantly improves realistic lighting because it mirrors real interior lighting design. Step 2: Use believable color temperatures Night interiors feel realistic when different lights have different tones: Warm lamps and pendants Slightly cooler ceiling fixtures Neutral task lighting in kitchens and workspaces Even if you don’t measure every Kelvin value, you should avoid making every light the same color. Uniform lighting makes CGI look synthetic. Step 3: Respect light falloff Light falloff is how light fades over distance. In real life, brightness drops quickly as you move away from a lamp. If your night render shows a room evenly bright from a single lamp, the falloff is wrong. Correct falloff creates: Cozy pools of light Gradients on walls
Interior 3D Rendering Services for Design Studios and Furniture Brands
In a world where clients expect to “see” every idea before they approve it, interior 3D rendering services have become essential for modern design studios and furniture brands. Beautiful drawings are no longer enough. Buyers want realistic 3D visuals, retailers want consistent product images, and global teams want one clear visual language. Archirender3D exists to make that jump from concept to photoreal interior effortless. This page explains how our 3D rendering services are tailored specifically for design studios and furniture companies, how our workflow fits into your daily projects, and what makes our interior 3D work easier to brief, faster to approve, and more reliable over time. Why Interior 3D Rendering Matters for Design Studios If you run a design studio, you are constantly juggling concept sketches, moodboards, and technical drawings. The problem is straightforward: most clients struggle to fully comprehend plans and sections. They understand interior design only when they see an actual space. That is where our 3D rendering team comes in. Turn design intent into clear visuals Reduce rounds of revisions Because clients see accurate 3D renderings early, they spot issues before you reach the site. That means fewer late-stage changes, fewer site surprises, and more confidence in your design decisions. Protect your time and creative energy You focus on architectural design and interior concepts; we handle the heavy lifting of modelling, lighting, and visualisation. You remain the creative lead, and we become the technical extension of your studio. Why Furniture Brands Need Interior 3D Rendering For furniture brands, retail chains, and product manufacturers, the challenge is different but related. You need to show your furniture and products in real settings, at scale, in a way that feels aspirational and shoppable. From product to lifestyle Our interior 3D rendering services allow you to: Instead of stitching together inconsistent photoshoots, you build a library of renderings that can be reused across campaigns. Furniture modelling and product visualisation We provide high-quality furniture modelling for chairs, sofas, tables, storage systems, lighting fixtures, and more. Once a 3D model is built: This combination of product and interior rendering makes Archirender3D a practical partner for any furniture company with ongoing campaigns. How Archirender3D Works with Design Studios and Furniture Brands Unlike anonymous freelancer platforms such as Cad Crowd, working with Archirender3D means having a consistent team, a predictable process, and a shared understanding of your brand. We specialise in interior 3D rendering services for design studios and furniture brands | Archirender3D is built around three pillars: clarity, speed, and quality. 1. Clarity of brief and scope We start every project with a structured intake: If you are a design studio, we discuss the story behind the space: who uses it, how it feels, what should stand out.If you are a furniture brand, we focus on the product: hero pieces, target audience, and retail context. 2. Fast, iterative workflow Our process is designed to fit the way interior designers work: 3. Quality as a habit, not a one-off We optimise for long-term collaboration: Service Overview: Interior 3D Rendering Services Our core rendering services for interiors are built for two main audiences: design studios and furniture brands. Within that, we adapt our offer to each unique studio or company. For design studios We provide: Design studios gain a visual language that is both aspirational and technically accurate. For furniture brands We provide: Furniture brands gain consistent 3D material that fits every campaign and channel. Modeling Services and Asset Libraries At the heart of our work is precise, efficient modeling. Custom modeling services We build: Once you have this library, each new project becomes faster and more cost-effective. We are not just creating single renderings; we are building visual infrastructure. Compatibility with your tools We can work from: This makes Archirender3D an easy plug-in to existing workflows without forcing you to change your core design process. Visualization for Real Estate, Retail, and Product Launches Interior 3D rendering does not exist in isolation. Many of our clients operate at the intersection of real estate, retail, and product launches. Real estate developers and agents For developers and agencies, we create: This makes our work relevant to both the design studio and the real estate team selling the final space. Retail and e-commerce We help furniture brands: The result is a unified visual experience, no matter where the customer encounters your products. Our Quality Standards: What Makes Archirender3D Different Quality is not just about resolution. It is about how believable the space feels and how accurately it represents your designs and products. Photoreal yet brand-appropriate Attention to materials and textures Consistency across projects Because we act as a long-term visualization partner, we maintain a consistent level of quality across every project. Your clients see the same standard in every presentation, catalogue, or campaign. Collaboration, Communication, and Quick Quote We know that interior 3D rendering services have to fit smoothly into busy schedules. That is why communication and clarity are treated as seriously as the images themselves. Transparent timelines and milestones For each project we define: You always know where your renderings stand. Clear pricing and quick quote To get started, you can request a quick quote with: We respond with transparent pricing, timeline estimates, and a suggested approach—no hidden extras. Who We Work With Archirender3D is built around close, ongoing partnerships rather than one-off jobs. We work with: In each case, our goal is the same: to make 3D rendering a predictable, high-value part of your workflow. Why Choose Archirender3D Over Generic 3D Platforms You can find freelancers on big platforms, or even on technical sites like Cad Crowd, but there are real differences between that model and a dedicated visualization studio. With Archirender3D you get: We are not just selling isolated rendering services; we are building a long-term visualization partnership. Start Your Next Interior 3D Rendering Project with Archirender3D Whether you are presenting a new interior design concept to a client, launching a furniture collection, or preparing marketing visuals for a real estate development, the right
3D Interior Rendering for Realistic Home Visuals
Whether you’re an architect, interior designer, or real estate professional, 3D interior rendering is changing the game by providing photorealistic visuals that capture the essence and personality of a living space.
7 Signs It’s Time for Architects to Outsource 3D Rendering

In today’s competitive architectural landscape, the ability to deliver stunning visual presentations is crucial. However, not every architecture firm has the in-house resources or expertise to produce photorealistic 3D renderings that impress clients and investors alike.
How 3D Exterior Rendering Transforms Architectural Design
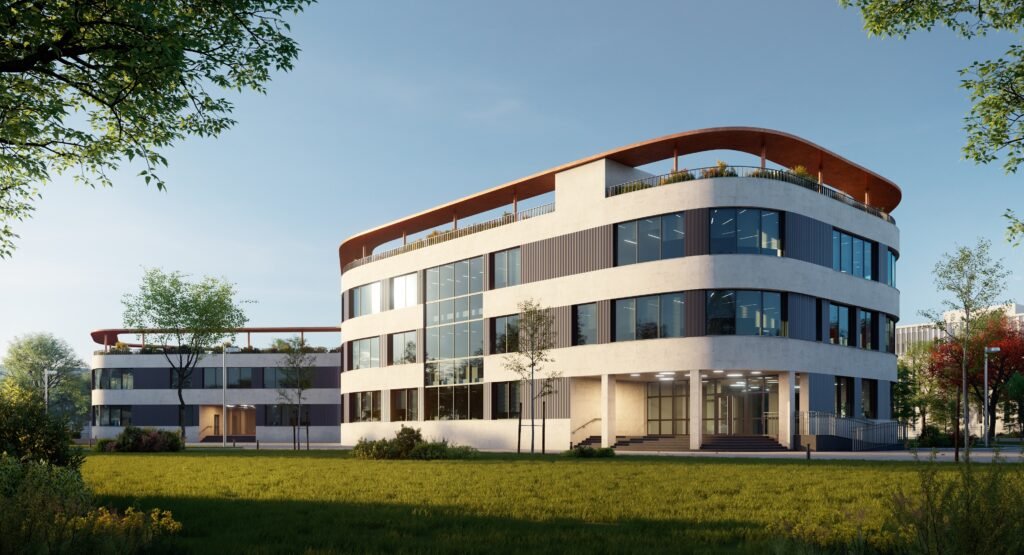
In today’s fast-evolving architectural landscape, the way we present our projects can determine success. The advent of 3D exterior rendering has transformed architectural design practices, enabling designers, builders, and real estate professionals to communicate their visions in the most dynamic, impactful way.
How 3D Architecture Animation Boosts Property Value & Offers
3D architecture animation is the process of creating realistic, computer-generated videos that simulate walkthroughs, flyovers, and detailed views of architectural projects. Unlike static images, these animations allow you to experience a building’s design from various angles, lighting conditions, and even during different times of day.